2014-08-11

Putting Graffiti on my cars

To begin with, my current preferred method of moving cars around the layout is with the “4 turn Car Card system”. I have tried the “Tab on Car” system and although very good, I still prefer the 4 turn at present.

A problem I had is with my freight cars, in that I have many duplicate cars simply with different road numbers. For instance, I have 3 off 50’ boxcars of exactly the same road name, length, style etc, that when using them with the Car Card system, operators are going to have problems reading the small numbers denoting the car. With all the cars “currently” in use, I have specifically chosen different cars. However, there is only so far one can go. I also use photos of the individual cars to help operators know exactly which Car Card refers to which Car on the layout. So 3 photos of the same car on 3 different Car Cards was still going to cause a problem.

I hit on the idea of using Graffiti decals to individually identify each of the duplicate cars. For instance, in the case of the 3 exact same freight cars; one I would leave as is, and the other two, I would fit decals to.

I purchase 2 sets of the same Blairline Graffiti decals. The reason for two the same was that I would fit the same decal in the same place on both sides of the car, so that no matter which side of the car one looked at it, it would resemble the photo on the car card.

Lets get to some examples and some photos: -

Below are 3 off 50' boxcars which are exactly the same in all respects. The only difference being the road numbers. They all initially looked like the centre car which also shows the car card that was in use. The other two on either side were not being used as it would have caused great confusion. Here though, the new Graffiti placed on each one can be seen and now uniquely identifies the cars. Now all I need to do it take some photos of the other two and make up suitable Car Cards.


With the ones below, they also look like the ones above. However, on closer examination, it can also be seen that they are actually different. Not just in shape, but the BN herald below is smaller then the BN herald above. Again, by adding Graffiti, I increased my Car Card freight by a further 2 cars.


These are two 40' boxcars which are the same. Again, by adding Graffiti to the one, I have added an extra wagon to my fleet.


These two below are 2 of 3 MRL wagons I have. For some unbeknown reason, known only to heaven knows who, I only decaled the one. When I get home, I will do the last one (3rd of the 3).


Please excuse the photo below for it's quality, however, the rake of cars in the front are the cars once all of them were complete. So I went from 4 unique wagons in use to 10 wagons now available for use on the rail-road, and hopefully operators will be able to easily identify the cars against the Car Cards during an operating session.

As for the decaling. That was as easy as always. As mentioned, I used Blairline Decals. They are laser cut around the decal for easy removal. I would use Microscale "Micro Sol" and "Micro Set". Micro Sol really softens the decal so that it conforms to the shapes on the car body.

I would brush some Micro Sol over the area where the decal was going to go. Then place the decal in some warm water for about 30 seconds. From there I would take it out the water and slide the decal onto the car and using a knife blade, gently slide the decal into place. From there, I would add some more Micro Sol over  the outside of the decal and that was it. Put the model to one side for the day and end of story :-)

2014-04-22

Tam Valley Depot QuadLN Loconet servo controlers and IO

I have been doing a lot of research for a cost effective switch controller and actuator that would give me the biggest bang for my buck.

What I wanted was the impossible. I wanted to be able to control a switch from either a control panel, the throttle or finally JMRI. I also needed to know what position the switch was in at any time, especially when booting up the layout for a session. Bottom line, it all came down to cost, not just for the controller, but also the drive that would actually move the switch.

The Tam Valley Depot QualLN and a SG90 9g servo fitted the bill perfectly.

Firstly the servo. I buy these form Hong Kong on Ebay. I buy a 12 pack and having purchased a pack last week, they come in at R33.82 per servo. End of story there.

Secondly and lastly, the QuadLN. What does this beast "not do" would be easier to answer. However, here is the list of what it can do and what I wanted it for.

  • It can control 4 separate switch "areas". So if you have a crossover with two switches, one servo output would control both servos for the two switches.
  • There are then 8 separate inputs and outputs for whatever you want. 4 of them are standard for the fascia controllers and LED's, but if you do not need fascia controllers and indicators, they are available for other IO's. I will be using these for the fascia controllers.
  • There is then the additional 4 I/O's for something else. In my case I will be using these for Block detection. I can theoretically then detect a mainline, a passing siding to that mainline, and the blocks on either side of the mainline.
  • The QuadLN is a Loconet device that can hook into the Digitrax Loconet and all messages are sent over the Loconet and not by hooking the device to the rail power.
  • I do not need sensors on the servos to show alignment as this is remembered in the QuadLN when a switch is either thrown or closed. So no matter what, even if the power is lost, the QuadLN will remember the switch position when power is restored to the layout.
  • Routes can be programmed directly into the QuadLN. so one press of a button on a ladder would change all the switches down the ladder if so set.
  • And lastly and very importantly for me, selected switches can be locked out if required. So if I wanted to lock out certain mainline switches during an operating session, I could do so. This could put all mainline switches in the control of the dispatcher. The respective fascia controller push buttons would thus not be operational. However, when an operator requested track and time at one of the switch locations or area, the dispatcher could temporarily hand control back to the operator by turning on the push button functionality for the respective switches. Absolutely awesome.
  • Lastly, with the feedback of switch positions from the QuadLN, this could be tied into a nice signalling system one day.
Below is one of the QuadLN's fitted under my yard at Whitefish. If you look carefully, you will see 2 sets of 2 servos linked together. This is to control 2 separate crossovers on this side of the yard. There are a further 2 servos controlling separate switches.

Scenery update and one Helix covered

There has been lots of work done on the layout since the last post, however, just not documented in this Blog unfortunately. I really must try to update the blog more regularly. There is too much to write and show in this one post, so they will be spread out over the next couple of posts which I will do in quick succession hopefully.

Well, I have been doing some of the scenery on various parts of the layout. The one helix on the visible staging side of the layout has now been covered. This has been a long time coming.

I basically covered it with Chicken wire and then newspaper draped over the wire before cloth was placed on top and covered in RhinoGLIDE. RhinoGLIDE is a product used for covering wall joints and is very smooth with no stones or grit like that in RhinoLITE. To give it the earth colour, I add yellowy/brown pigmentation.

Below is the hardshell covering. Just needs grass and trees now.


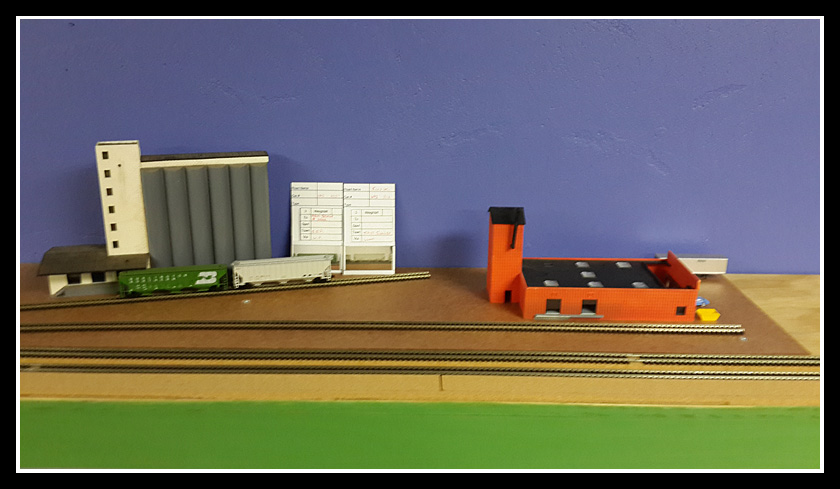
Then over at Columbia Falls, I have put in the commuter station and the base for the grain silos. I have also put in some roads connecting the two. I again used RhinoGLIDE to contour from the plywood base up to the road edge as well as the station parking etcetera. Again, what I now need to do is scenery.

Again, below are some photos: -

Here is the commuter station. This will not be an Amtrak stop but the RDC commuter between Whitefish and East Glacier Park will stop here.

This is the same area, but looking over the commuter station towards the small grain silos.

2013-12-23

The Blue Train (Prototype)

Although not “model” train related, this post is “prototype” train related.

Earlier this month on the 4th, 5th and 6th December, Lindsay (my wife) and I got to spent two nights on the South African Blue Train and an awesome day at the Nedbank golf challenge at Sun City.

On the Wednesday, we all met up at the Sheraton Hotel in Pretoria at 15h00 for refreshments and snacks before being bussed down to Pretoria station at 16h30. The train left at 18h00 sharp and arrived at the Sun City Halt the next morning at 09h00. From there, we were bussed to Sun City 3km’s away for a wonderful day and being spoiled absolutely rotten.

At 16h30 we returned to our chariot with the train again departing at 18h00 and arriving back at Pretoria station on Friday morning at 09h00. Then back to the Sheraton to pick up our cars and the end of an absolutely amazing experience. 

Below is some additional commentary with photos. Click on the photos to enlarge.

Here was our arrival at Pretoria Station


Lindsay before entering the tunnel.


Red carpet nogal


It was then into the Blue Train waiting lounge. Again, snacks and drinks were waiting


Just before boarding the train.


This was our room for the next two nights. Also to the left, an on-suite toilet and shower which I unfortunately did not take a photo of :-(


Below is the Lounge car where we would congregate for drinks and much talking. First photo at night, the next one's during the day.


Next was the dining car. Again, one photo in the morning and the 2nd at night. Full 5 course dinner with all the china and cutlery. Like going back to the 50's!


Dinner was a formal affair with strict instructions to attend with Tie and Jacket! It was actualy quite something to dress up like this again. Can not remember the last time I wore a tie and Jacket.


Lindsay at breakfast ready for a day of Golf.


Here the blue train was departing Rustenburg station. Next stop, Sun City Halt.


This is Sun City Halt. It is about 3 km's East of Sun City and is literally a platform on the side of the main line. From here we hopped onto a Bus that took us along to Sun City. Unfortunately, due to cameras and cell phone restrictions at the golf, I was unable to take any photos there.

Below, we have just hopped off the train and getting on the bus.


Lindsay, ready for a day in the sun.


We left the train down a small dirt road before getting on the tar road. On the tar road, we back tracked and had to go over the train. Below, the train was directly in front of us. These photos just don't do justice to the actual scene. The sun was behind us lighting up the train.


After a long lovely day at the Golf, we arrived back at the train to glasses of refreshing ice cold Champagne. No Lindsay is not greedy LOL, she picked one up for me :-)


This was our beds made up, chocolates each evening and all the bells and whistles.


Each night after dinner, everyone would retire to the lounge car for Cognac and cigars. Lindsay and I would go the the "Non smoking' lounge. There were two on the train. 


And that was the end to an absolutely awesome 2 nights and one day. Lindsay says this is one more item deleted from her bucket list. What more can I say.

For those wondering, the trip from Pretoria Station to Sun City is very short, however, throughout the night we were constantly moving. On the return trip, I activated a tracking device on my phone to see what was happening. Well, they took us around and around Pretoria, Via the North, then East, and in particular, even going around Centrarand just East of Kempton park. Below is a image of our track. Please excuse the two straight lines which are data errors.


2013-08-21

Progress update

OK, It has again been a while since I have done an update. Honestly, other life happenings just took over. Not to say nothing has been happening on the layout though. I have still been doing little things here and there, and mainly operating as well as the odd show layout with the club and the Bend-Track modules we built.

Anyway, I have finally started to concentrate on the layout and East Glacier Park in this instalment. Looking at the photo below, this is a view down the town. This is just for an overview. Further below I go into more details on the specific industries.

In the foreground of the above image is a short spur for the RDC town commuter. I decided to incorporate this to add some more operations. Theoretical, the RDC will transport townsfolk to Whitefish from the various towns along the way. Once in Whitefish, holiday makers will return to East Glacier Park to head to the various ski slopes. Returning later in the day and then bringing the townsfolk home in the evening.

Below is a better photo from the side on. There still will be an Amtrak train, but that will be just once per day and also does not stop at all the towns along the way.


Still in East Glacier Park here are some of the industries. Below is AGM grain and seed on the left and Heinz Dried Fruit on the right.

Down below we have a further two industries. In the far distance is an oil distributor I decided to put in at the last minute. It can be seen that I have not even put the track down yet.

In the foreground, is a wood industry of some kind. I am still in a quandary with this one and am not happy with the layout or kit at this time. It just does not seem correct. So, currently I am mulling this industry over.


Below are two closer views of these industries. The Oil dealer I still need to name, and the timber section will be called Lumbar Logistics.


Well, that is it for now. I will keep you updated on developments as they happen... Or as soon after as is possible :-)

2013-01-16

Classifying the freights Part 1


From recent posts previously, you will see that I have been doing more and more operations, in particular, by myself. This has proven both rewarding and challenging and has caused the grey matter to work a bit of overtime.

This "Part 1" covers the arrival and switching in and out of the two mainline freights. Part two will go more into detail about actually classifying the loads that have just come in ready to go to the respective local towns.

You see, my yard basically has 2 mainlines with an arrivals / departure track, and then 5 classification tracks and 1 run around track. The problem I have is that there are 6 towns to classify for as well as the Chicago and Seattle towns and thus, far too few yard tracks unless I do some doubling up.

To start with I made the two classification tracks next to the arrivals / departure track available for blocking the Chicago and Seattle outbound loads. Irrespective of which side a local comes in from, cars destined for Chi or Sea could be classified. The remaining 3 classification tracks were then for the remaining 6 towns!


The next problem I had was where to put wagons coming in from a Chi or Sea train once it arrived on the arrivals / departure track? My yard leads were simply not long enough to pull off the incoming loads, then couple at the same time to the outgoing loads and then place them onto the back of the train. After some thinking, I came up with a marvellous plan which is probably standard operations on most other peoples layouts :-).

Instead of a track for Chi and another for Sea, I made the two tracks on the left "Sea Inbound" and "Sea Outbound" and the two tracks on the right, "Chi Inbound" and "Chi outbound".


Now, say a Sea - Chi freight arrived. It would enter from the left to right. A switcher sitting to the left would then remove the "from Sea" and place them on the same line as the To Chi wagons would be, but they would be to the right of the yard as the Chi - Sea train is working the other way. The switcher would then hook onto the "To Sea" wagons and push them onto the waiting train. As simple as that.

Does this not interfere with the classification of the Chi and Sea trains you may ask. Well, both "To" trains are sitting on their respective tracks from the previous ops session if the yard master has done his job correctly. If anything, the yard master is actually waiting for the two freights to arrive before even moving one car on the layout.

So, there you have it. Hopefully I will have a pictorial story in the not too distant future.

Enjoy

2013-01-13

A constructive weekend

I am sure I am like many other modellers with a number of projects in various forms of completion or actions to be done. Well, this weekend was one where I tackled a number of them and cleared them off my desk, so to speak.

Firstly, I have 3 Kato Santa Fe C44-9W War-Bonnets. They have been absolutely awesome runners, however, I think they have done one too many shows and were getting a bit jerky and not running at all OK. I opened them up to lubricate the worm bushes as well as the motor bushes. Once complete and semi re-assembled, they went on the programming track. I have 3 Kato Amtrak Genesis locos that programming wise are perfect. I downloaded the CV's from the Genesis and then uploaded them to the C44-9W's. Instantly, they were already running 100% better. All I needed to do next was set the V Start, V Mid and V Max and they were running perfectly.

Next, I have a box with a couple of wagons that needed work done to them in one way or another. One of the wagons is a Bethgon coal hopper that I wanted to fit a body mounted Microtrains coupler. The reason for this is that on the coal train, one of the moves is to push the string into the coal mine. The problem though is that the fixed coupler on the loco pushes the coupler in thus the truck to one side often resulting in pesky derailments. Hopefully, a body mount pushing against a body mount would solve the problem. The truck on the other side of the wagon would remain unchanged  The fix involved removing the truck and cutting a suitable piece of styrene that I glued to the under part of the wagon. I then glued the body-mount coupler to styrene shim that I had glued in place. Then I refitted a truck that did not have a coupler pocket attached to it. Once completed, it was back on the track for a test run. To say everything went well is an understatement. Problem is I now have one more to do on the other rake of cars :-(

Lastly, I have a number of Atlas wagons with the Atlas version of the Microtrains coupler. Problem is, some of them can be a problem coupling, so much so that one of them had been cast into the project bin. Well, I still had some Microtrain replacement couplers from a 10 pack I purchased a while ago. What better time then to look around the layout for any other wagons with the Atlas  "Microtrain" couplers and replace them. 5 were done in total :-)
Then, there was some good old running and switching to end off the day.

Life is good

2013-01-04

A typical day

I have spent a lot of time visualising a typical day of operations on my sub-division. I have had to consider when to have trains arrive and the reasons for that. An example was how to structure my arriving freights together with local freights. If the freights arrive late in the session, are they then blocked and delivered the next session or, do they arrive early, get blocked and delivered in the current session.

I also wanted to be able to portray to operators how the day looks in order that they have some idea on how the operation session flows with what trains arriving and departing and when.

To this end, I have created a document entitled "A typical day on the Whitefish Sub-Division" which will form part of the operations pack. Hopefully operators will now have some idea on how the "play" transpires on the Whitefish sub-division. The document is below: -

____________________________________________________

A typical day on the Whitefish sub-division


This paper gives a basic overview of a typical day on the “Whitefish Subdivision” and what to expect, as well as do, during a typical operating session.
Whitefish is situated in Montana with trains travelling between Seattle on the United States North West coast through to Chicago in the central north of the United States transporting goods from the West (China, Japan, India etc) to the US and vice versa.

A typical day starts at 06h00 in the morning with the following occurring during the various hours of the day.

Passenger local.

During the day, an RDC runs between East Glacier Park and Whitefish transporting townsfolk from their homes in the countryside to their workplaces at Whitefish and back. The first run departs East Glacier Park at 06h00 for Whitefish. Then at 12h00 the local returns with passengers who have finished work for the day and again returns later with any passengers that are going to Whitefish for the afternoon to do some shopping or watch a movie. Finally at 17h00, the local returns to East Glacier Park with tired workers or shoppers and ties up for the night ready to do the same the next day.

Through freights.

During the early part of the morning, both the westbound CHI-SEA (Chicago Seattle) and eastbound SEA-CHI (Seattle Chicago) manifest trains arrive and loads are switched out and in.

The outgoing loads were prepared for departure the day before, after the local freights had returned from their daily chores and are coupled onto the freights before continuing on their way.

Local freights.

After the arrival of the morning freights, the loads received from the two through freights are switched and blocked accordingly for the local towns by the yard switchers. Once complete the local freights head out to the various towns and switch the industries there. Heading east, there are 4 towns to be switched. Due to distance and time needed, the tasks are split into two locals: -
  • One local switches Columbia Falls and the Kalispel branch line, and then West Glacier, further along the Line.
  • The second local travels further and starts at Essex which is a small town, however, it then goes to East Glacier Park which has a lot more work to do.

There is a third local that makes a short run to Stryker to deliver interchange traffic for Eureka which is in an opposite direction (West) to the other two locals which head East.

Once complete, the locals return to Whitefish later in the day arriving on the arrivals/departure track. The wagons they return are subsequently blocked into the Chicago and Seattle classification tracks to prepare them for their collection the next day by the Through freights, as happened earlier in the day.

Amtrak

During the day, there are two Amtrak passenger trains stopping at West Glaier and East Glacier Park, Whitefish and a flag stop at Essex if necessary. How the flag stop is decided is by the throw of a dice located at Essex. If it lands on "6", a flag stop is required. Any other number and the Amtrak runs straight through. 

Intermodal

There are two intermodals, one in each direction. However, these are switched directly into the intermodal yard at Whitefish.

Coal Train.

Lastly, there is a coal train. The motive power leaves Whitefish running light to Columbia Fall and then reversing to the power station on the secondary mainline between Columbia Falls and Whitefish. Here the train collects the empties and then runs east across the division to Browning and the Coal mine located north of there. The empties are reversed into the Coal mine and the loaded train is then connected and the Unit train returns to the power station between Whitefish and Columbia Falls. Once complete, the motive power returns to Diesel servicing.
_______________________________________________________

And that is a basic day in the life on the Whitefish Sub-division.

Progress to date 04-01-13

Oh wow,

I popped into my blog yesterday knowing I have been lazy in posting, but I am sure you can imagine my amazement when I see my last post was just short of a year ago which was February 2012!!! What have I been doing :-(

Well I can say I have not been sitting on my posterior. There has been quite a bit of progress on the layout, not just in operations but also scenery and track-work. The siding at West Glacier has been put in together with 1 industry spur, as well as a couple of industry spurs at East Glacier Park. This has added tremendously to my operations.

In October last year, I had a layout visit from members of the club I belong to called EMRIG (East Rand model rail-road interest group). I must say there was a burst of energy to get the layout prepared for that visit LOL.

I have also started small scale operations. It took me quite some time to design my Car Cards and Weigh-bills  Also deciding on industry names and the like which is still being developed. Suffice to say, I am now having tremendous fun switching and my brother and I had a semi formal operating session last Sunday operating just the through freights and resultant local freights.

So... I will hopefully start making more regular posts again and hopefully not leave it for a year. I will be sending a second post after this one giving an overview of the trains on my "Whitefish Subdivision". So, stay tuned for further updates.

2012-02-17

Eureka branchline

In previous posts, I spoke about operations and adding branchlines and then the Kalispell branchline in particular. In this article, I talk about the Eureke branchline.

The internet and google is an amazing resource. I mentioned in the "Adding Branchlines" article that I had fount that the Mission Mountain Railroad ran (run) two branchlines. The one being Kalispell and then the other, Eureka. So, I then did a search on rail industries in Eureka. First link to pop up was the "Gwynn Lumber and Reload Inc". I was looking for more industries to enable additional and varied cars to be sent to this town. However, again, this Gwynn Lumber and Reload came up trumps. By reading the information in the web page, the following was stated: -

"Gwynn Lumber and Reload Inc, is an international reload facility. Our speciality is transferring dimensional lumber from truck to rail car or truck to truck. We ship lumber all over the continental U.S. and some overseas markets. Our facility is not just subject to lumber products. We have also reloaded wood pellets and wood pulp. Gwynn Lumber has many enquiries about other products coming from and going to Canada. We have the capacity to handle them in most cases. Some of these products include diesel fuel, coal, heavy equipment, and various other products".


By looking at the above, I can have petroleum cars, coal hoppers, flat cars with heavy duty vehicles on board and all this to compliment the normal wood products of the area.

Now, again, how was I going to incorporate this into my existing layout? Initially, I thought about putting a siding on the other side of the peninsular before heading to the visible staging. At the time I was thinking about the return loop for the Kalispell branchline. What about doing something the same on the other side. The visible staging from Whitefish I had called Seattle as this was where my trains were going. But, after looking at the prototype map, the Eureka branchline splits from the BNSF mainline at Stryker. Why not make the visible staging for trains approaching from Whitefish, Stryker. Brilliant!

Locals could enter Stryker from the left on the main line and head all the way to the end. From there, the train could unhook, do a run around and then push the cars onto the interchange track. This was just fantastic. So, without a track plan, lets go to a pictorial again: -

Today, the local heads out of Whitefish heading West to Stryker and Seattle beyond

Here he will be travelling through some scenic areas on the way: -


Stryker at last and entering onto the "Stryker" mainline. On the visible staging there are two tracks that are always empty and are considered mainlines: -


A view of the local heading down the mainline between the two staging yards, Stryker (Back) and Shelby (Front): -


At the end of the yard, the local disconnects, moves forward and then reverses and runs around its load to be able to push the wagons onto the interchange track. The engines use the second mainline to do the run around: -


Lastly, we see the local has pushed the wagons onto the interchange track and is returning to Whitefish empty: -


Now, you may be asking, which cars do you know go here and which cars go elsewhere. For that, I am putting together a 4 card car operating system which I have taken a liking to. If you see this comment, you will know I have yet to post it. I will be putting a link to that post here, once the article is done.

Till next time...